Set up CMEK on Claude Platform on AWS
Create an AWS KMS key in your AWS account and attach it to a workspace on Claude Platform on AWS.
If your Claude Console sidebar doesn’t show Account managed by AWS, follow Set up CMEK with AWS KMS instead.
Before you start
-
Customer-managed encryption keys (CMEK) are turned on for your organization.
-
In the AWS account that hosts your organization, you can create AWS KMS keys and set key policies (
kms:CreateKeyandkms:PutKeyPolicy). -
You have the Admin role in the Claude Console.
-
The IAM principal you sign in with has these permissions:
- Sign in:
aws-external-anthropic:AssumeConsole - Add a key:
aws-external-anthropic:RegisterKey - View keys:
aws-external-anthropic:ListKeysandaws-external-anthropic:GetKey - Attach a key:
aws-external-anthropic:UpdateWorkspaceoraws-external-anthropic:CreateWorkspace, pluskms:DescribeKey,kms:Encrypt, andkms:Decrypton the key - Pick the key from a list (optional):
kms:ListKeysandkms:DescribeKey
To scope them, see IAM actions.
- Sign in:
-
You have a workspace with no key attached, ideally a new one, because existing data stays under Anthropic’s key. You need its compartment ID for the sample key policy.
In the Claude Console, open the Data retention page and select the workspace from the dropdown menu at the top. Copy the Compartment ID under Encryption key. The Get WorkspacePreview with links to the API reference available — press Tab until focus enters the card, Escape to return. endpoint returns it as compartment_id.
In AWS: create the key
Write the key policy
This policy gives the AWS service principal aws-external-anthropic.amazonaws.com access to your key. Use only the name published on this page, never one sent by email or chat. Copy the policy into a text editor:
{
  "Version": "2012-10-17",
  "Statement": [
    {
      "Sid": "AccountRootAdmin",
      "Effect": "Allow",
      "Principal": {
        "AWS": "arn:aws:iam::<AWS_ACCOUNT_ID>:root"
      },
      "Action": "kms:*",
      "Resource": "*"
    },
    {
      "Sid": "AllowClaudePlatformOnAWSCrypto",
      "Effect": "Allow",
      "Principal": {
        "Service": "aws-external-anthropic.amazonaws.com"
      },
      "Action": ["kms:Encrypt", "kms:Decrypt", "kms:GenerateDataKey"],
      "Resource": "*",
      "Condition": {
        "StringEquals": {
          "kms:EncryptionContext:anthropic:compartment_uuid": ["<COMPARTMENT_UUID>"]
        },
        "ArnLike": {
          "aws:SourceArn": "arn:aws:aws-external-anthropic:*:<AWS_ACCOUNT_ID>:workspace/*"
        }
      }
    },
    {
      "Sid": "AllowClaudePlatformOnAWSDescribe",
      "Effect": "Allow",
      "Principal": {
        "Service": "aws-external-anthropic.amazonaws.com"
      },
      "Action": "kms:DescribeKey",
      "Resource": "*",
      "Condition": {
        "ArnLike": {
          "aws:SourceArn": "arn:aws:aws-external-anthropic:*:<AWS_ACCOUNT_ID>:workspace/*"
        }
      }
    }
  ]
}
Keep aws:SourceArn on both service principal statements. Every organization on Claude Platform on AWS shares this service principal, and the condition limits its access to workspaces in your organization’s AWS account. Don’t add aws:SourceAccount, because Anthropic’s calls to your key send only the source ARN.
The conditions determine which workspaces can use the key. The sample follows the second row:
| Workspaces that can use the key | What to do |
|---|---|
| Every workspace in the account | Delete the StringEquals entry and keep the ArnLike entry. |
| Only the workspaces you list, for encryption and decryption | List each workspace’s compartment ID in the StringEquals entry. |
Only the workspaces you list, for every call, kms:DescribeKey included | In both statements, replace the aws:SourceArn value with a JSON array of full workspace ARNs. The StringEquals entry is then optional. |
A full workspace ARN has this form:
arn:aws:aws-external-anthropic:<REGION>:<AWS_ACCOUNT_ID>:workspace/<WORKSPACE_ID><WORKSPACE_ID> is the workspace ID, which starts with wrkspc_, not the compartment ID.
Replace each <AWS_ACCOUNT_ID> with the ID of the AWS account that hosts your organization, and <COMPARTMENT_UUID> with the compartment ID.
In each list, include every workspace the key is already attached to. Don’t use IP-based restrictions.
Create the key
Create the key in the AWS account that hosts your organization, in the same region as the workspace.
Open the Create key wizard
Open the AWS KMS console and switch to the region for the key. Go to Customer managed keys and click Create key.
Configure key
Make sure that these options are selected:
- Key type: Symmetric
- Key usage: Encrypt and decrypt
- Advanced options > Key material origin: KMS
- Advanced options > Regionality: Single-Region key
Click Next.
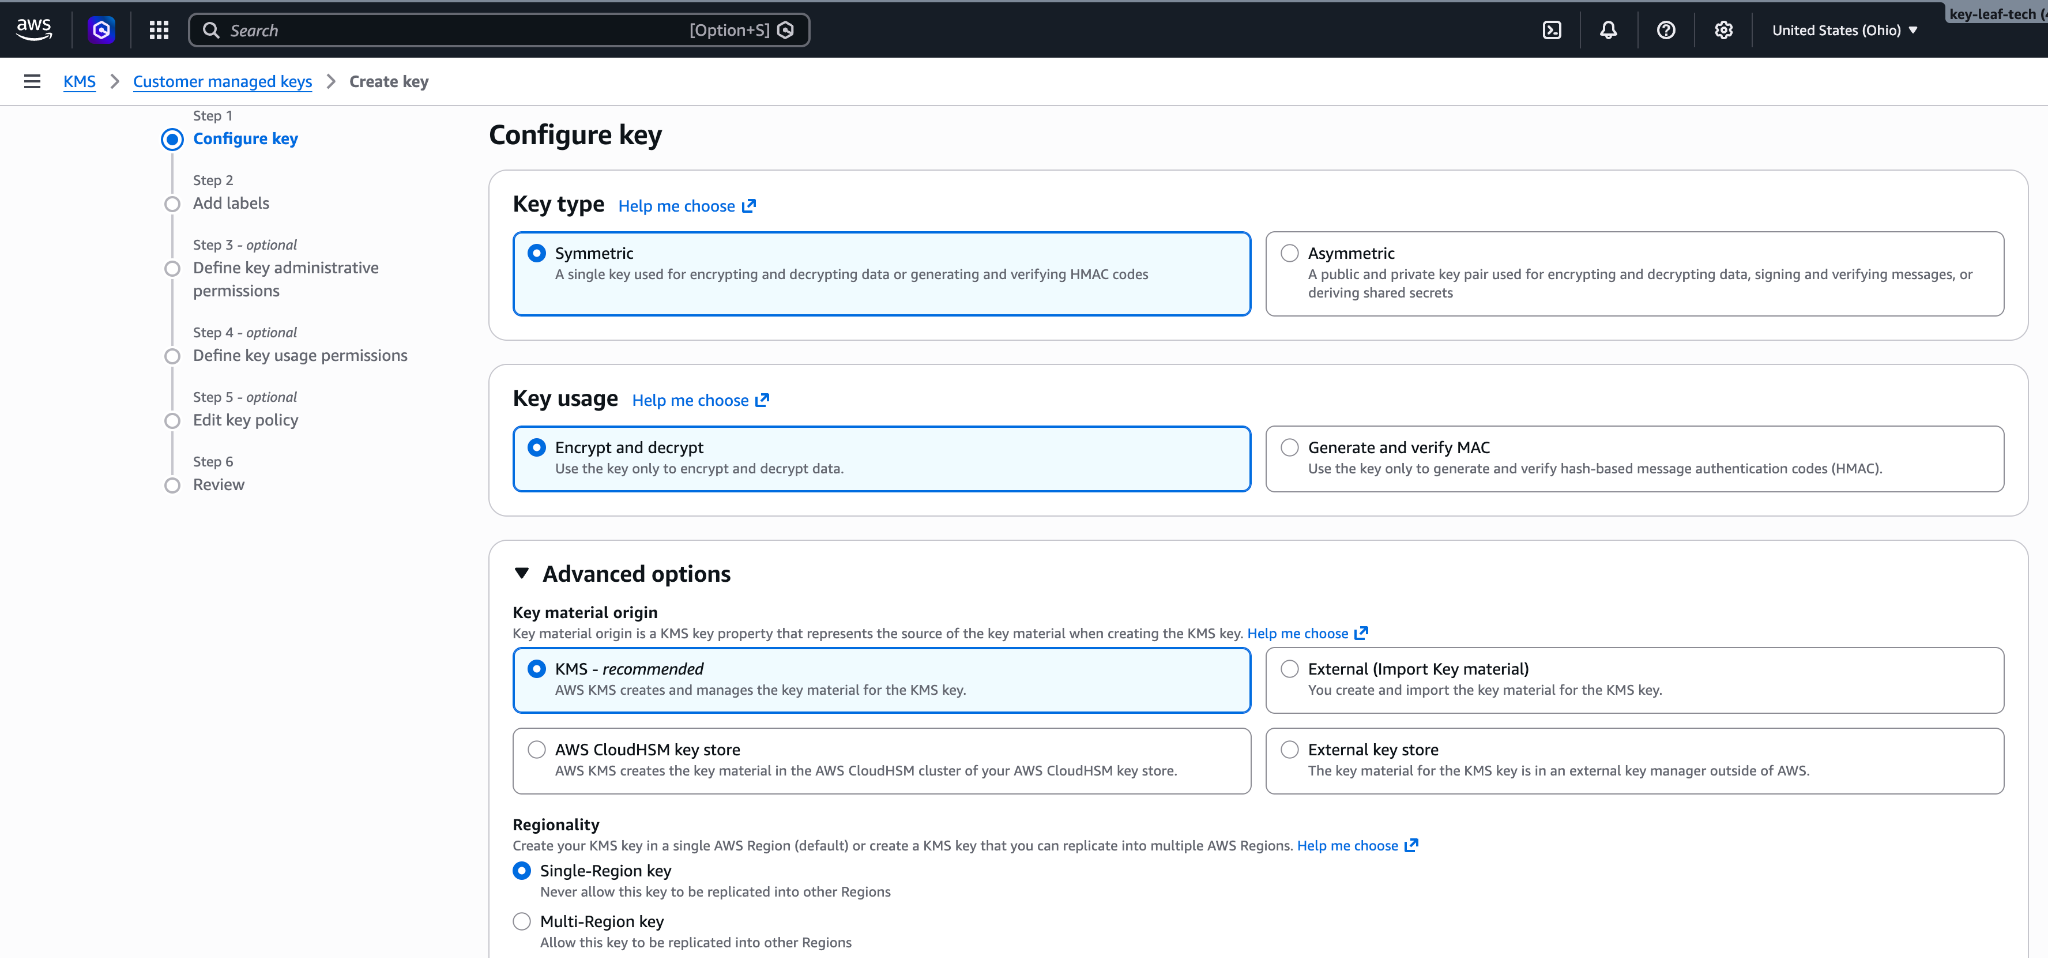
Symmetric, encrypt and decrypt, single-Region key. Add labels
Enter an Alias for the key, such as
anthropic-cmek. Click Next.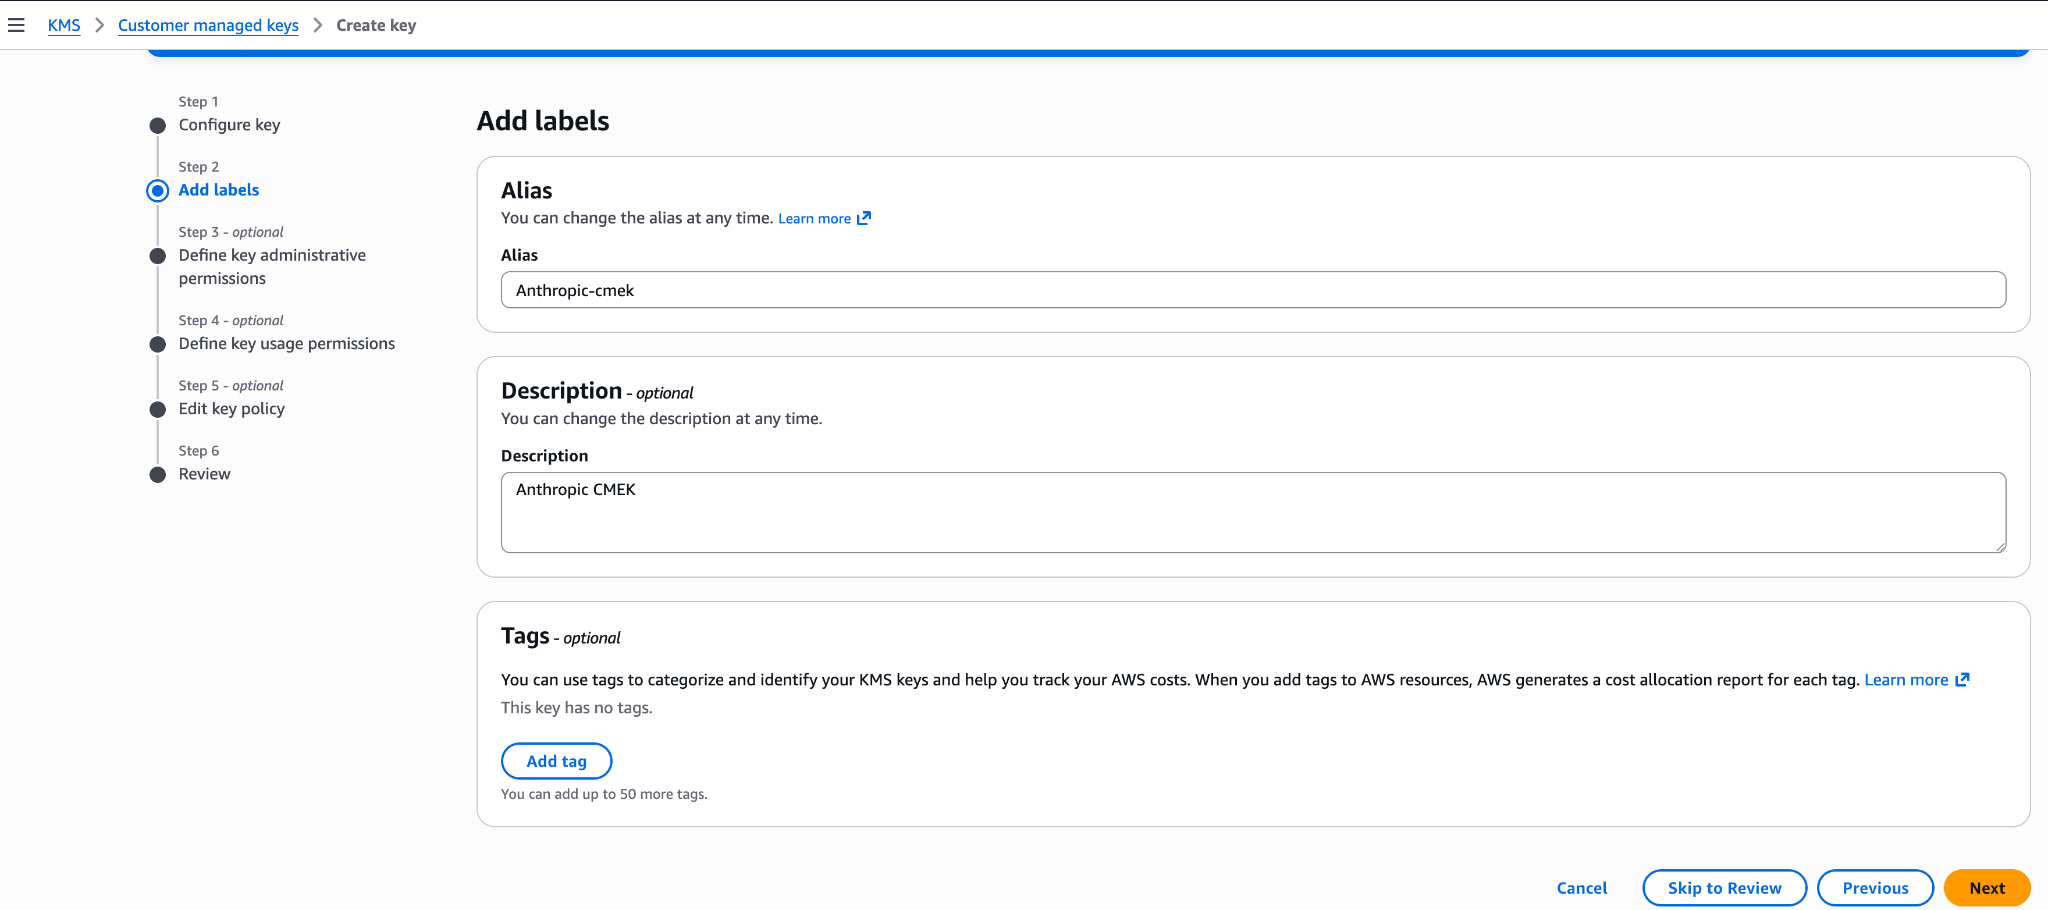
An alias for the key. Define key administrative permissions
Don’t select any key administrators. Your key policy already gives your AWS account full admin control. Click Next.
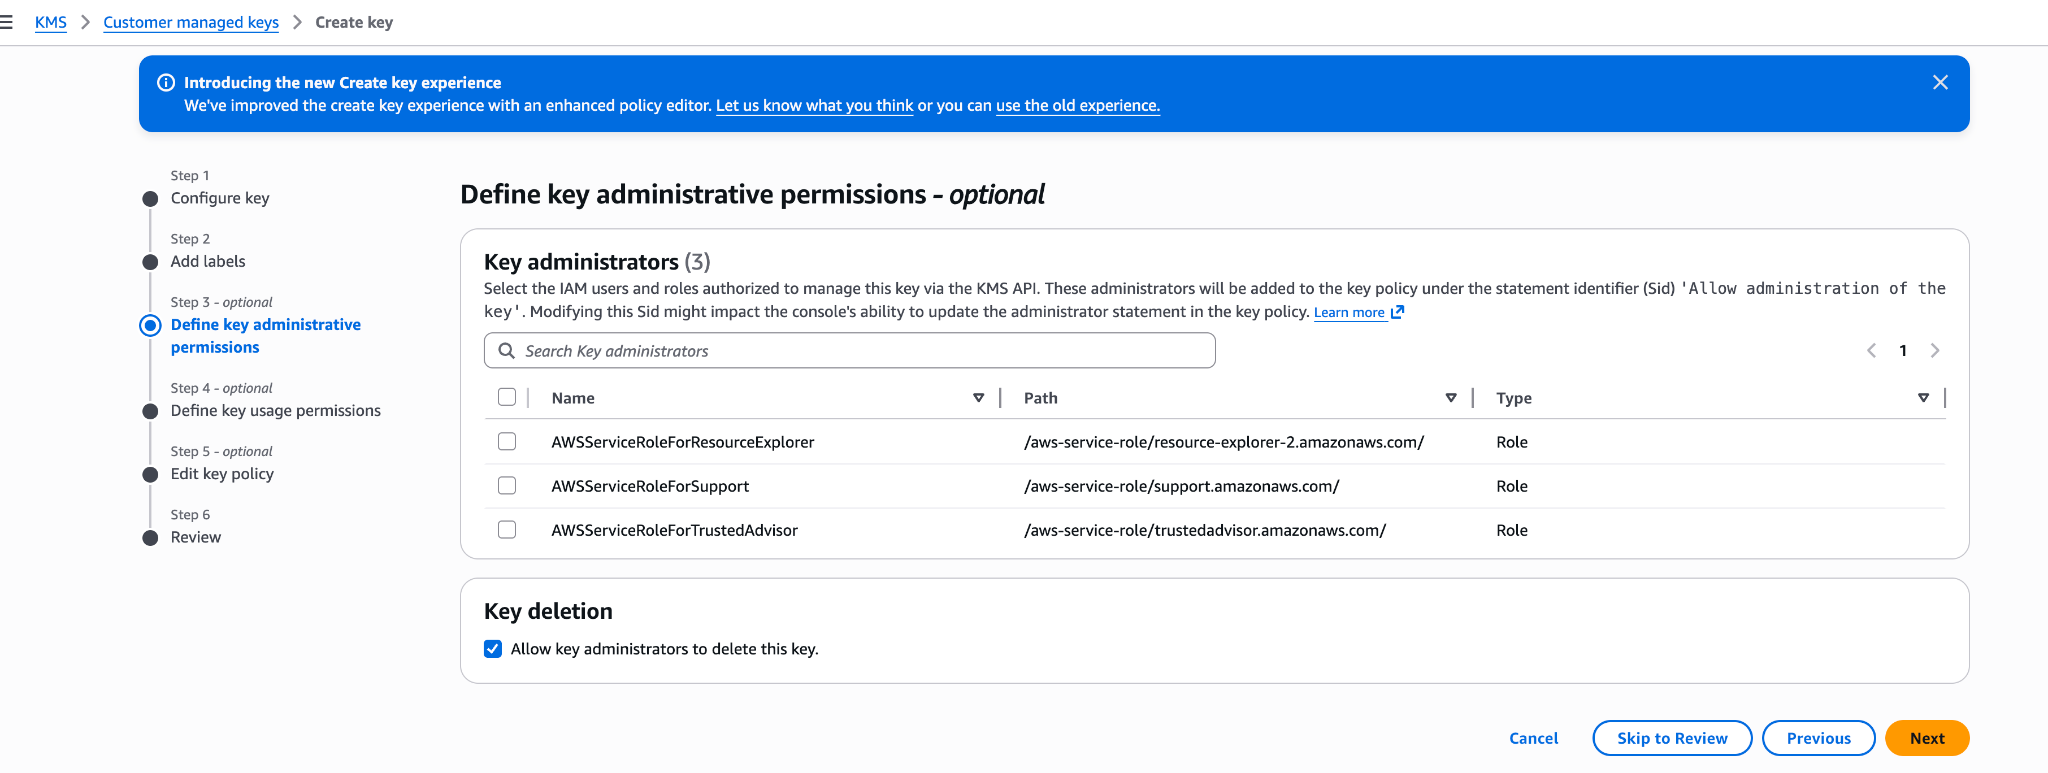
Leave key administrators empty. Define key usage permissions
Don’t select any key users, and don’t add anything under Other AWS accounts. Your key policy already grants the access that’s needed. Click Next.
Edit key policy
Click Edit. Replace the whole policy with your key policy, then click Next.
Review
Click Finish.
Copy the key ARN
In Customer managed keys, open the new key and copy its ARN. Whoever adds the key in Claude needs it.
Save your key policy as key-policy.json, then create the key. Replace <REGION> with the key’s region.
aws kms create-key \
  --region <REGION> \
  --description "Anthropic CMEK" \
  --key-usage ENCRYPT_DECRYPT \
--policy file://key-policy.jsonCopy KeyMetadata.Arn from the output. Whoever adds the key in Claude needs the ARN.
In Claude: add and attach the key
Sign in to the Claude Console through AWS. To script this part instead, use the endpoints listed in IAM actions.
Open the encryption key settings
In the Claude Console, open Encryption keys on the Data retention page. If the section isn’t there, select Organization from the dropdown menu at the top.
Add the key
Under Encryption keys, click Add key and enter a Display name.
Enter the key ARN
In KMS key ARN, select your key. If it isn’t listed, click Enter ARN manually and paste the ARN. Anthropic rejects alias ARNs and multi-Region keys. Click Add.
Attach the key to a workspace
- At the top of the Data retention page, select the workspace from the dropdown menu.
- Under Encryption key, select the key and click Save.
- Select the checkbox to confirm that you have read the CMEK documentation, then click Confirm.
You see Workspace settings updated. Once the key takes effect, CloudTrail records the calls to your key.
Attaching checks the key with one encrypt call and one decrypt call, so a key policy problem shows up here. If you get a KMS access error, see the causes and fixes.
Add another workspace later
If your key policy lists workspaces:
- If the workspace doesn’t exist yet, create it without the key. A workspace gets its compartment ID and ARN at creation.
- Edit the key policy. Add the workspace to each list your key policy has: its compartment ID in the
StringEqualsentry and its ARN in eachaws:SourceArnarray. - Attach the key in the last step of In Claude: add and attach the key.
Was this page helpful?